Sion Full Clear Guide – 2:37 Blue Start

Blue Buff

Gromp

Wolves

Raptors
Red Buff
Krugs
What makes Sion Jungle strong?
 Sion has a very fast clear, because his
  Soul Furnace deals % max
  Health as an AoE spell, which can be abused to increase his speed time. Also his main damaging ability,
  Decimating Smash, deals bonus damage against monsters. Combine decent monster damage with his Soul Furnace passive, which gives him 4 bonus Health for every small and 15 bonus Health for every large monster killed and you've got yourself an unstoppable scaling jungler! Just for reference, Sion gets about 150 bonus Health for his first clear, which amounts to a
  Ruby Crystal with a gold value of 400
  Gold!
Gold!
Which Runes are BEST for Sion?
In order to execute this clear you need to take double  Adaptive Force in your first two rows with
  Scaling Health as your third option. Going any other rune choice will make the execute ranges riskier and pet reliant which is something we want to avoid. Other then the three small shards, you are free to take whatever rune you want for Sion in the jungle, from tank options found in
  Grasp of the Undying,
  Guardian,
  Aftershock, to more damage oriented builds like
  Stormraider's Surge,
  Hail of Blades or
  Conqueror to
  Unsealed Spellbook.
What spell is best to start?
Even though Decimating Smash is our main damaging spell, taking Soul Furnace level 1 is crucial, because you don't miss out on getting bonus Health from its passive after killing the  Blue Buff - but also it allows us to drag the Blue Buff towards the
  Gromp and damage both of the, effectively saving up a lot of time!
Should you do Red Buff before Krugs?
Sion has a very fast first clear, so if there are no ganking opportunities feel free to skip  Red Buff, do
  Krugs first and then come back to Red Buff as your last camp. This allows a more efficient second clear, as your
  Raptors will spawn right after Krugs instead of a having a delay.
Important mechanics & tips
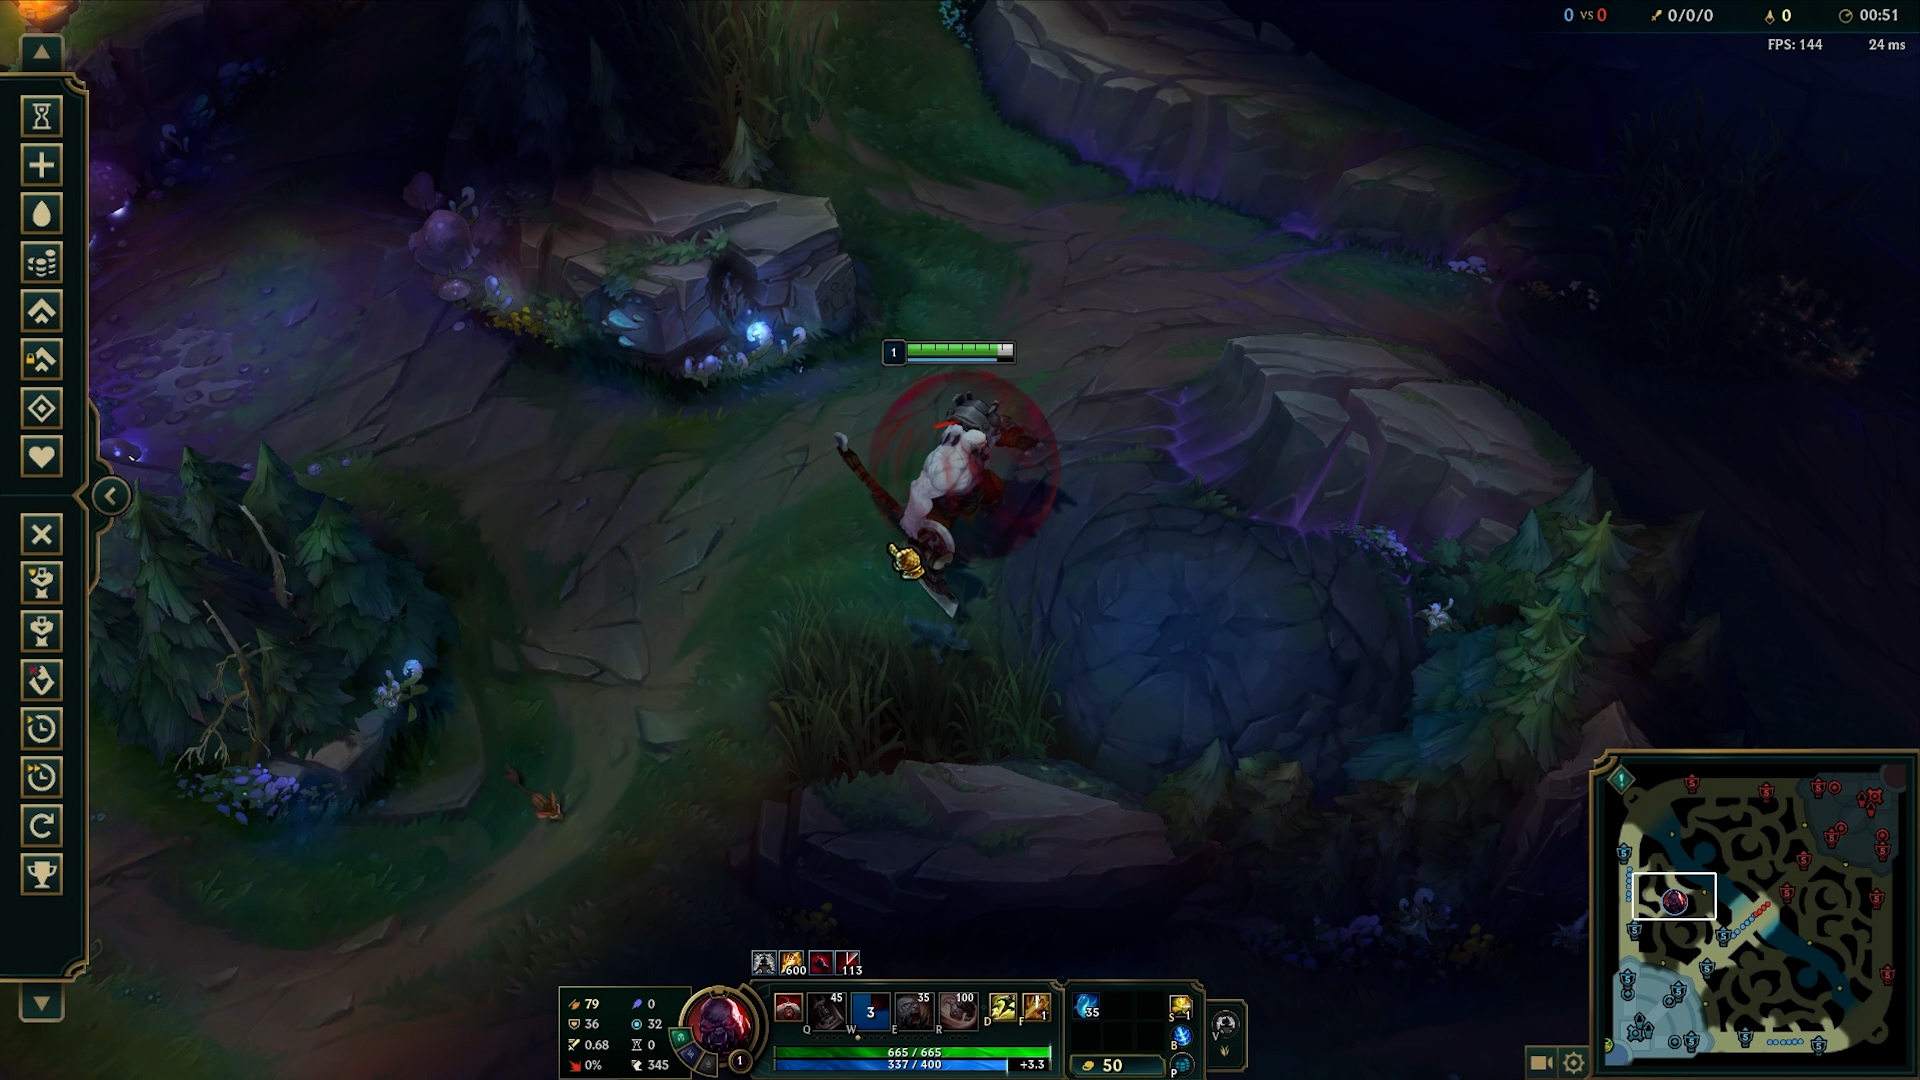
The clear itself starts at 0:51 - because your Soul Furnace shield lasts for up to 6 seconds, and using it this early, puts it on cooldown, which means we get it earlier, but its just at a right time so that when Blue Buff spawns at 0:55 we can recast the shield and it will deal damage to it.
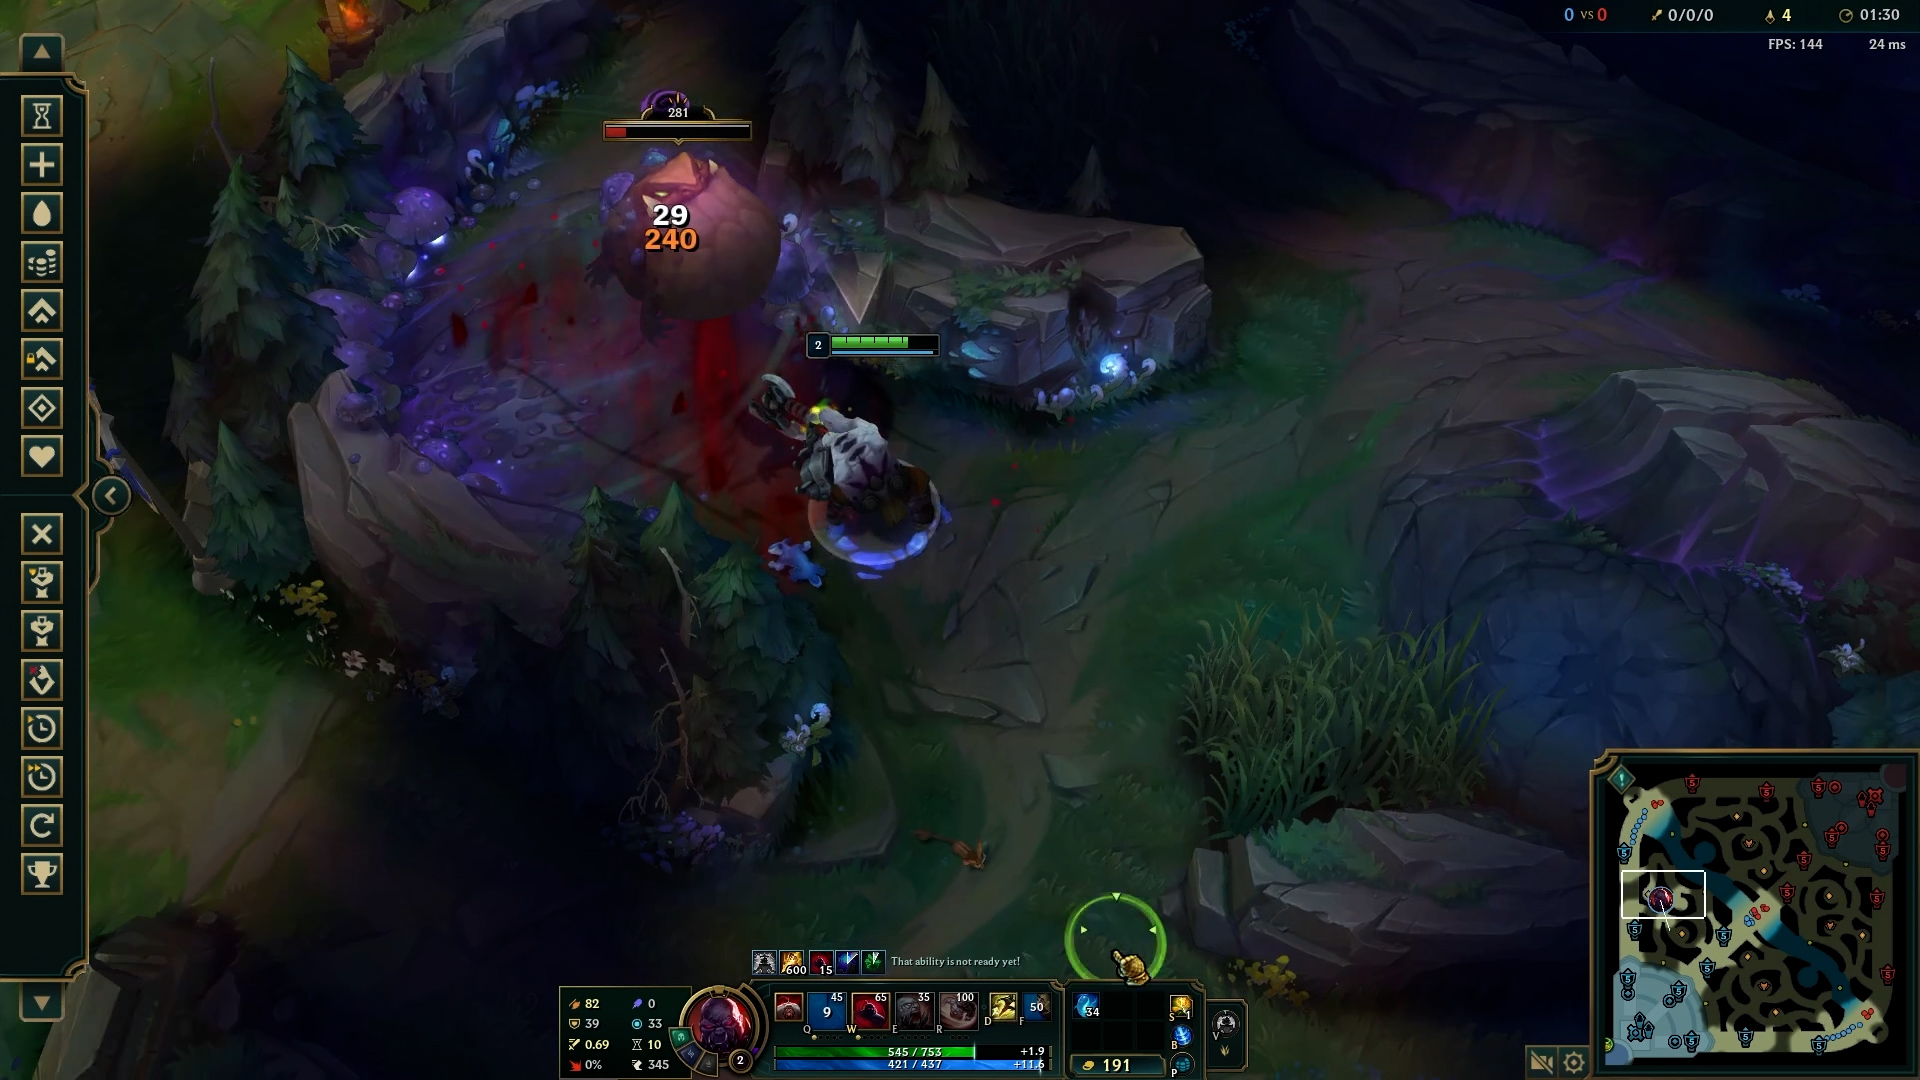
Once Soul Furnace comes off cooldown again, use it immediately, Blue Buff should be at about 400 Health - then move towards the Gromp, auto attack the Blue Buff once and recast your Soul Furnace so it explodes and deals damage to both the Blue Buff and Gromp. Jungle pet should finish off the Blue Buff.
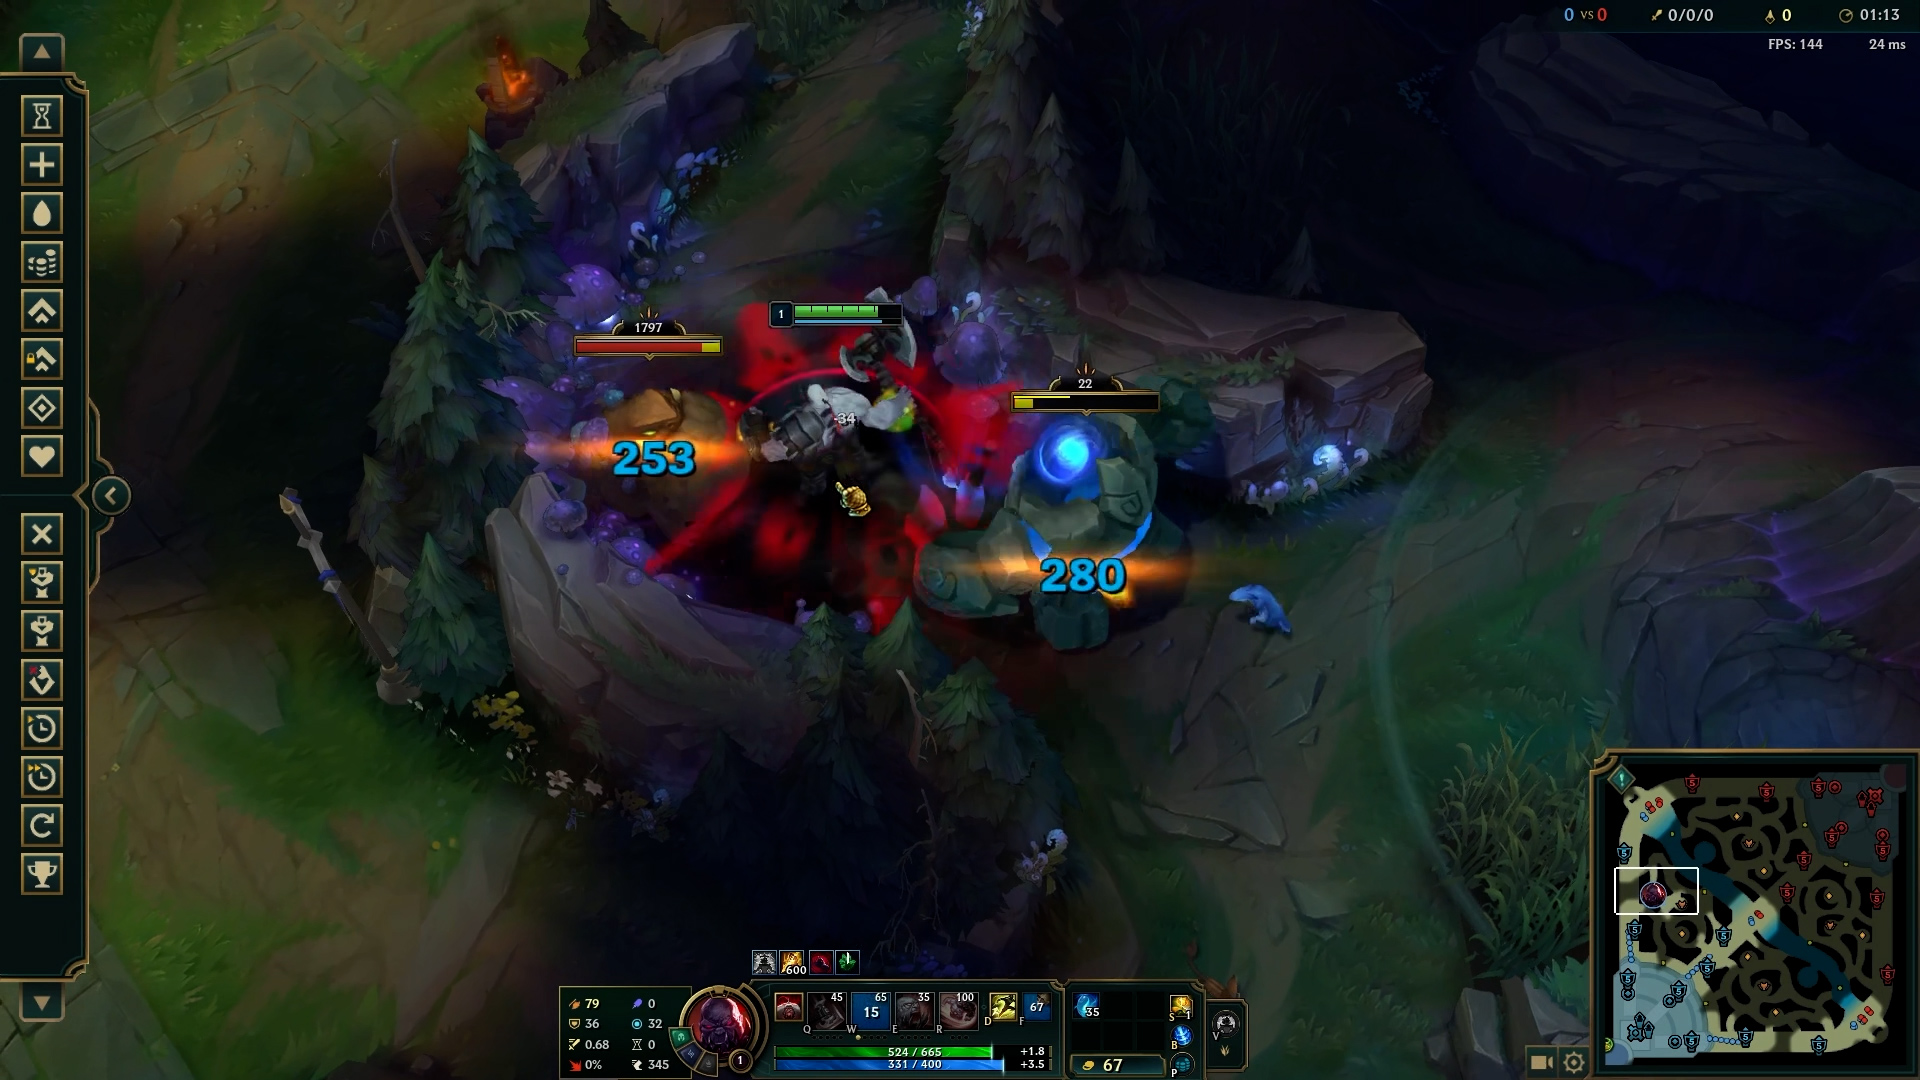
Transition from Gromp towards the  Wolves is probably the only hard part of the clear, but don't worry, I've got you covered! The trick is to first line up the Gromp with the end of the range indicator, then move on the absolute maximum of Sions attack range. And finally cast your Decimating Smash once its off cooldown, Gromp should be about 580 Health - maximum cast your Decimating Smash and immediately as it detonates, click towards the Wolves and start running while Gromp is in the air.
While running use your Soul Furnace to make a shield. Auto attack the Wolves once to pull them towards you and start running back towards the Gromp, just enough to recast your Soul Furnace and hit both targets with it.
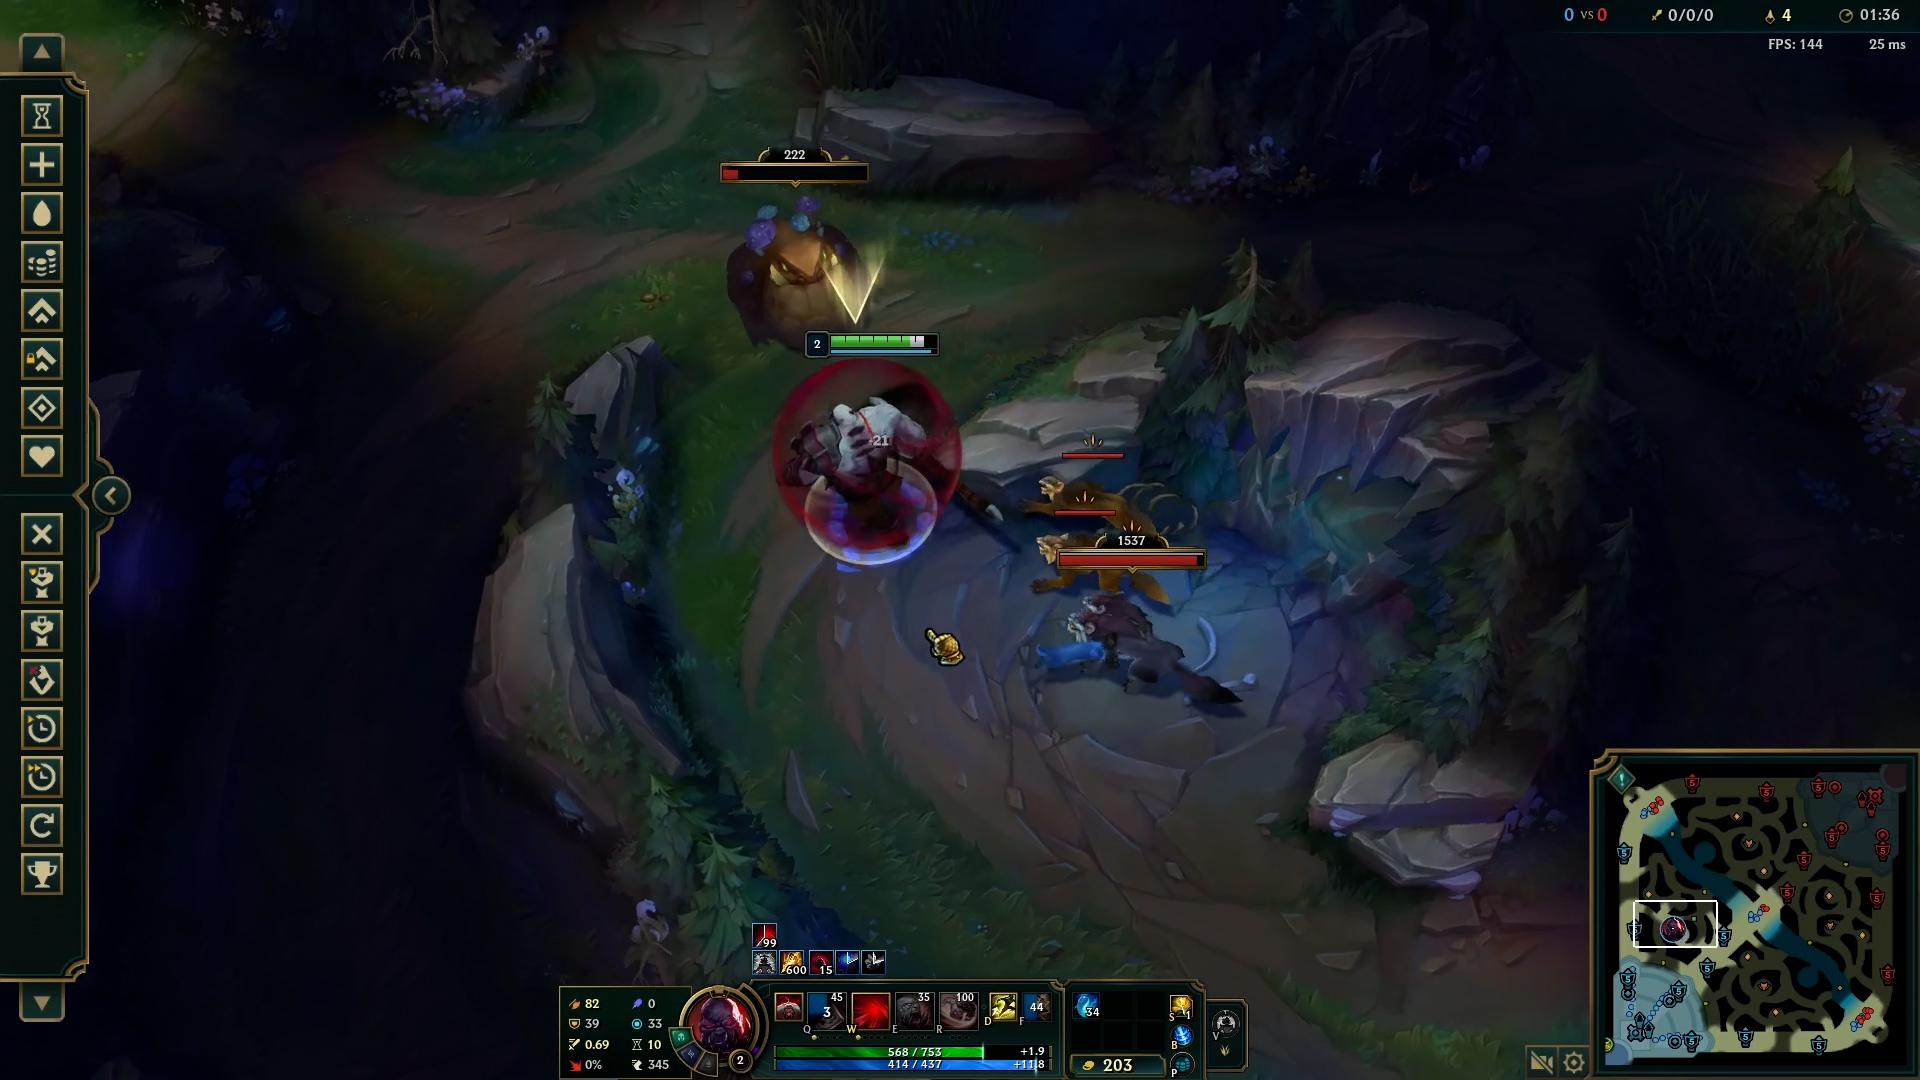
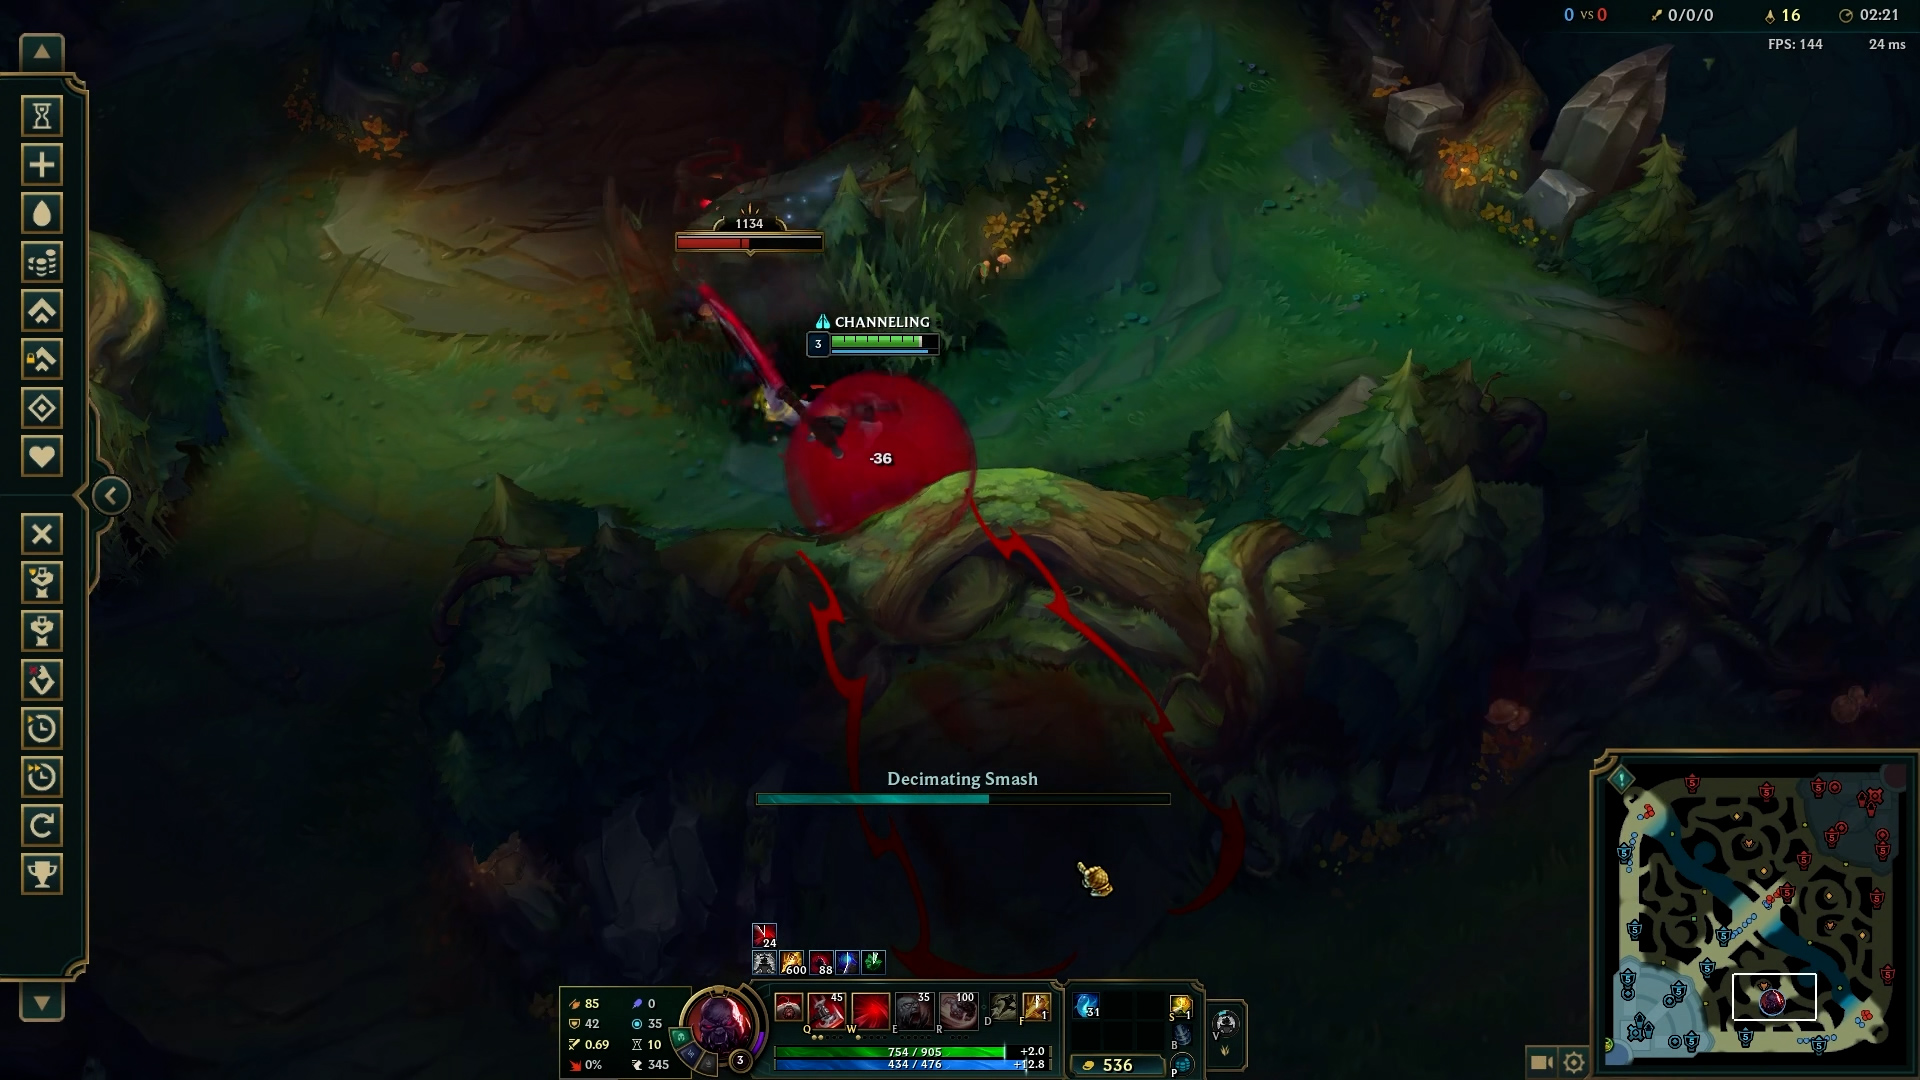
Once Raptors are very low, you want to move towards the end of the range indicator, and cast your Decimating Smash onto the Red Buff just like in the photo - this way you save precious time on your Decimating Smash cooldown, using it immediately and also it saves you one more auto attack - since by just walking over to the Red Buff, the jungle pet will start damaging the remaining big raptor and kill it.
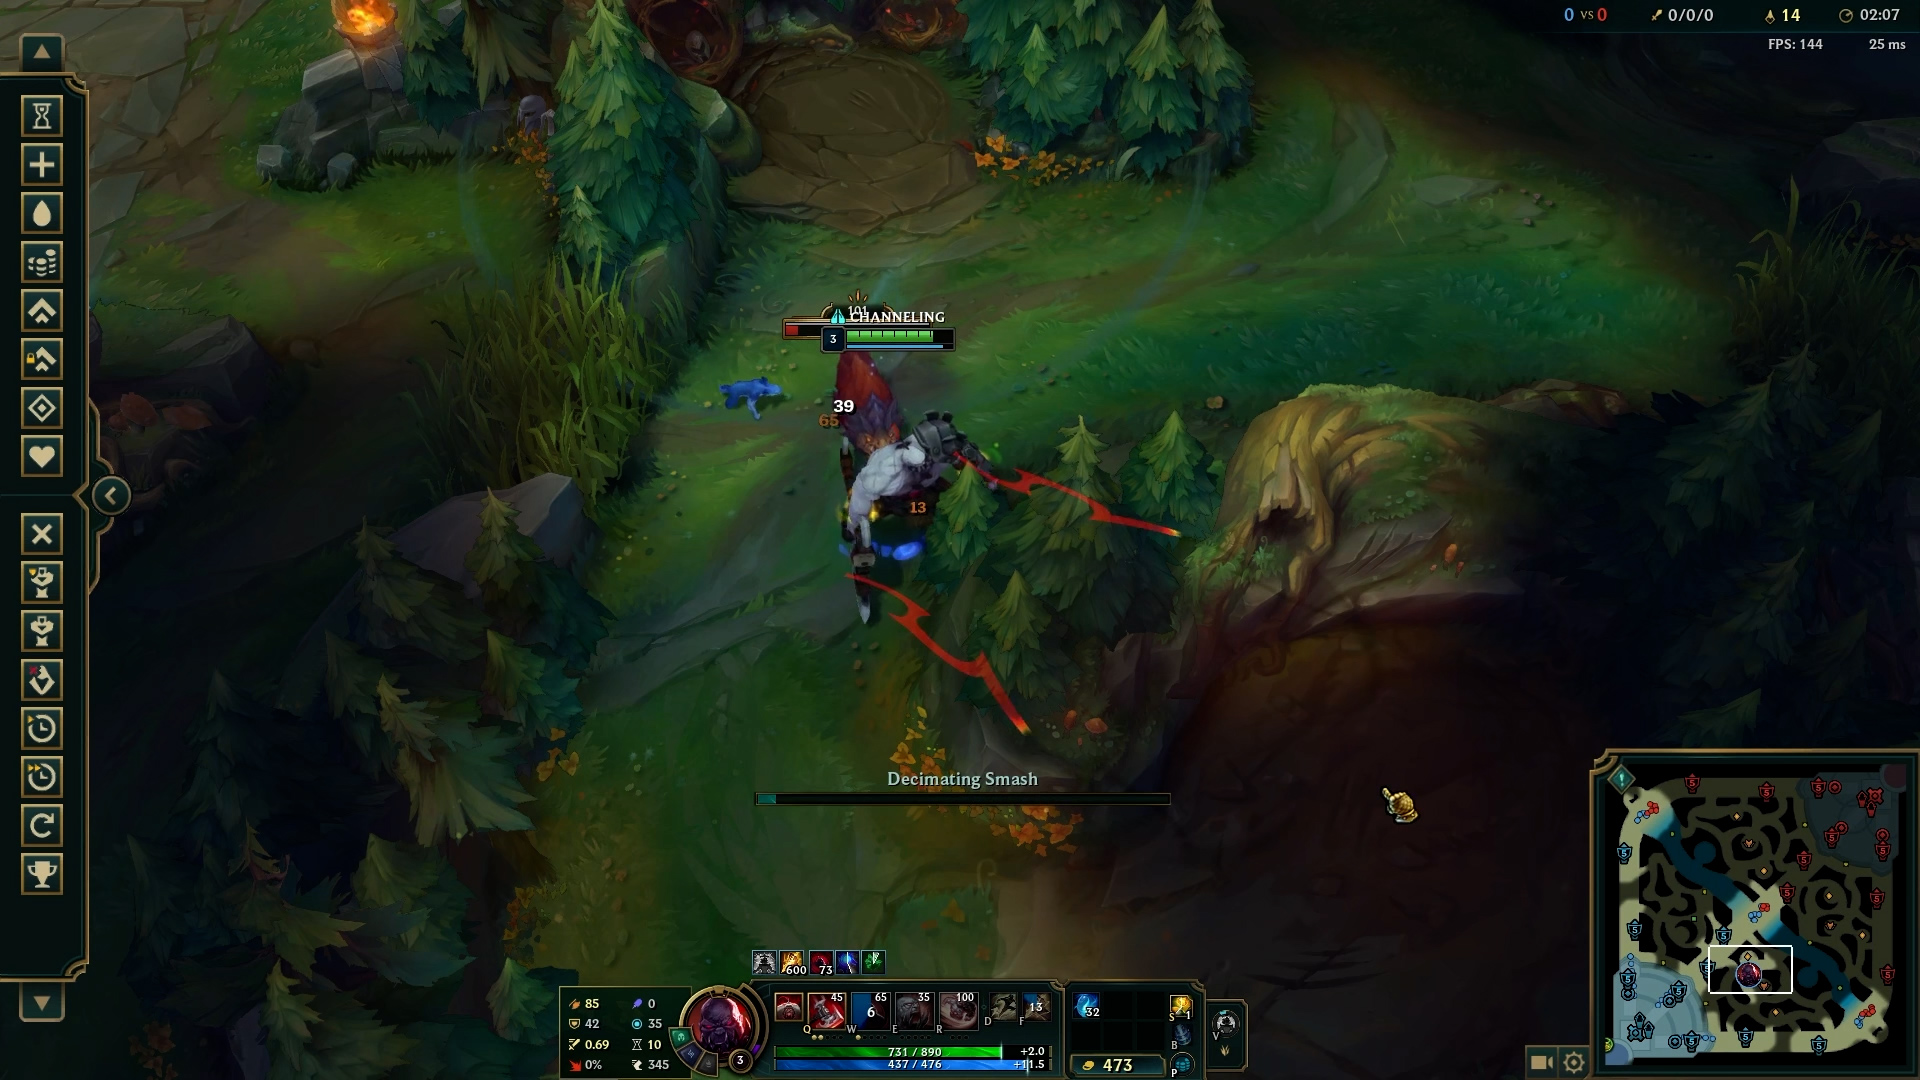
The second Decimating Smash cooldown while doing the red buff actually wont be used on the Red Buff, you will use it on Krugs, while also activating your Soul Furnace - and detonating both at the same time, on all three targets like in the photo below.